So you have a drum loop, you’ve either arranged it yourself or you’ve pulled in a loop from one of your favorite sample packs. The thing is they don’t sound how you want. Why do they not sound beefy enough? Or distorted enough? Or fat enough?
The fact is with some careful processing we can achieve beefy drums that can stand up to that of your favorite artists. Great examples of this are the drums found in tracks from big artists like Travis Scott, 21 Savage, and Lil Uzi Vert. The producers that work with them know their style and make fat distorted drums that punch through the mix. This is the foundation of what makes these tracks so popular and successful.
This is where plugins come in handy. There are plenty of individual plugins that can help you get the sound you want for your drums, but Narcotic has it all in one standalone VST. This plugin is really great for adding a little bit of distortion and warmth to your drums without making them sound too harsh or digital.
The techniques we’ll discuss in this article are pretty simple and can be applied to other aspects of your songwriting or beat making as well!
The main techniques used to achieve warm, fat, and beefy drums are actually quite simple.
The best effect types for fattening up drums
Distortion
Distortion or saturation is perhaps the most important here. Now there is of course unwanted distortion such as digital clipping in your DAW. But today we’re thinking about the added color and harmonics added by distortion and saturation plugins.
EQ
EQ is another thing to consider here. EQ stands for Equalization, and it’s usually in the form of a plug-in that allows you to manipulate the frequency makeup of your track in order to allow the composition to work together sonically
Reverb
How long a sound lasts after it has been produced is known as reverb. When a sound bounces off of a surface, it causes many reflections to accumulate. The sound and reflections are subsequently absorbed by the surface of the items around it, which causes them to decay. This is commonly replicated by audio plugins to recreate a natural sound of a space.
Compression
Lastly, we have compression or limiting. Compressors essentially reduce dynamic range. The distance between both the quietest and loudest sounds is reduced using compressors and limiters. By reducing maximum levels and keeping a greater average loudness, compressing can make your music seem more polished and tight.
Narcotic has all of these features built into one awesome plugin!
The rest of this guide shows you how to beef up your drum loops with Narcotic.
What is Narcotic?
Narcotic is a Multi-Effect VST plugin, it is the ultimate way to add motion, movement, and pulse to your sounds. At its core, Narcotic is a multi-effect, however, it boasts some industry-leading, unique and powerful features that give it the ability to transform your music in ways you’ve never heard before.
You can download Narcotic Here
How to beef up your drum loops with Narcotic. A Step-by-Step guide
Follow these steps to learn how to beef up your drum loops with Narcotic.
Step 1 Distortion
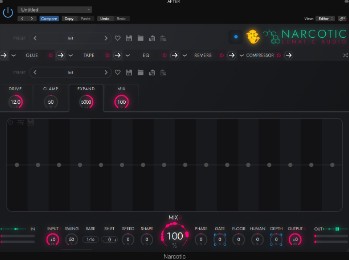
To achieve the desired distortion we’ve used two modules, ‘Glue’ and ‘Tape’.
Below you can see all of the modules added in order. It might be handy to quickly open up all of these modules before we get started.
The glue effect has a drive dial which adds a lovely clean drive, turn this knob to taste, I have opted for +12dB.
For a wider sound turn the expand knob up to 5000 (or to taste).
This first module will have added a nice clean drive and your drums will already sound fatter!
Next in the distortion section, we’re using the ‘tape’ module.
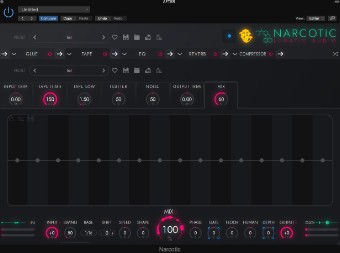
In order to not cut out any frequencies we need, to turn ‘tape high’ to 150 ips and ‘tape low’ to 1.50 ips.
The mix knob can then be adjusted to taste. A higher value will add more drive, harmonics, and saturation.
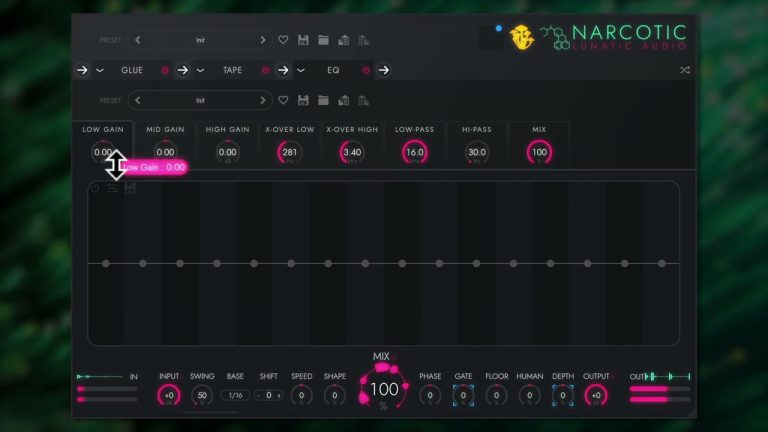
Step 2 EQ
Next, we have the EQ module. This one is going to depend on personal preference and the harmonic structure of your drum loop.
Personally, I found the low end of my drum loop to be lacking and wanted my kick to sound big and distorted. I boosted the low end by around 5dB which is quite a lot but it sounded great. The other parameters have been left as is but if your loop is lacking high-end or mids then play around as you see fit.
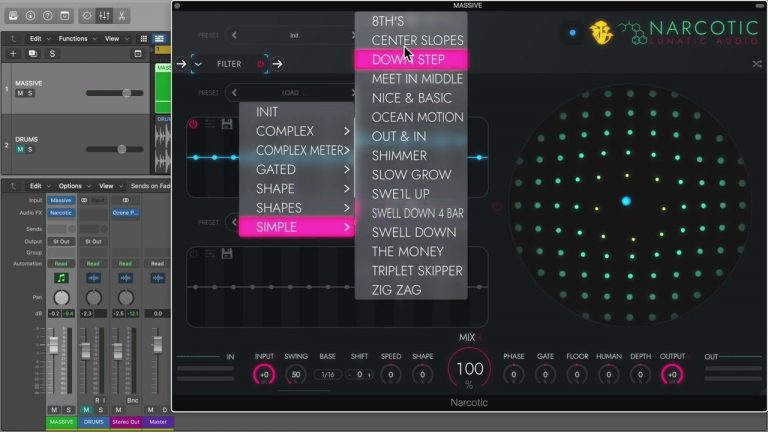
Step 3 Reverb
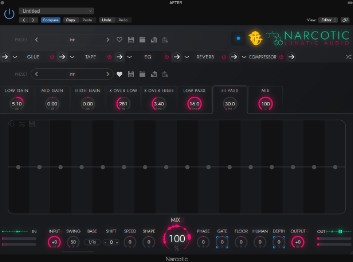
Our drums sounded a bit dry like they weren’t in a space together. To make a cohesive believable drum arrangement reverb is key. In moderation! I kept the color as is.
In order to achieve the desired size, I left the ‘Mix’ dial at 100% and slowly turned down the size until I reached a value I was happy with (15%). After this, the mix dial should be turned down to a relatively low value.
You want to hear the reverb but it shouldn’t muddy the drums. Around 10% is optimal.
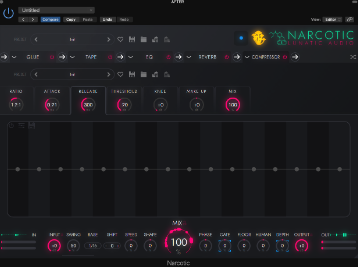
Step 4 Compression
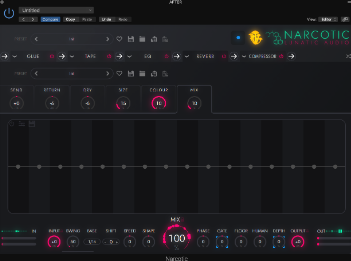
Lastly, we’re adding compression to glue our drums together and make sure the volume is more consistent. We’ve opted for a low ratio of 1.2:1 as we’re after a gentle glue, nothing too dramatic.
The attack is quick at 0.21ms and we have a longer release at 300ms as is often used with drums. Again, however, this can be adjusted to taste. The threshold, or the level at which the compressor starts working, has been set to -20dB. Everything else was left the same.
That’s everything! Below you can hear how we’ve beefed up our drums in 4 simple steps with Narcotic!
Audio Examples
Before
After
Thanks for reading! You should now have beefy-sounding drums that can rival your favorite producer all within one VST plugin.